Calgary’s No Bake Matcha Green Tea Cheesecake
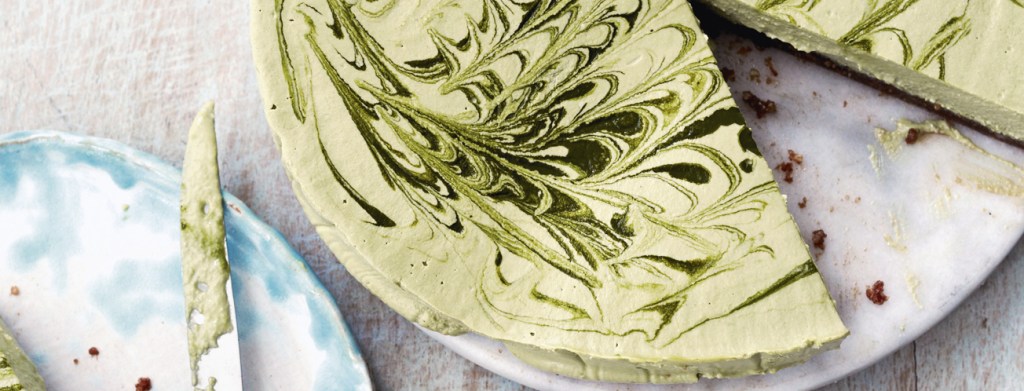
This ‘cheese’ cake’s deliciously creamy centre and rich crunchy crust make it one of my star treats and I look for any excuse to make it. It looks beautiful, making it a great choice to serve for guests and I’ve even made it as a birthday cake. It’s best served directly from the fridge.
Serves 8
Ingredients:
For the crust:
320g plain macadamia nuts (not roasted, salted or sweetened)
10g raw cacao powder
65g maple syrup
15g cacao nibs
1 tsp vanilla extract
½ tsp Himalayan salt
For the filling:
2 tbsp matcha powder, plus an extra
¼ tsp to decorate
2 ½ hot water, plus an extra ¼ tsp
470g plain cashews, soaked overnight or for as long as you can, then rinsed
435ml unsweetened nut milk (I use almond)
3 tbsp fresh lemon juice
2 tbsp fresh lime juice
190g raw agave syrup
1 tbsp vanilla extract
pinch of Himalayan salt
6 tbsp coconut oil, melted
Method:
To prepare the crust, line the base of a 22cm spring-form tin with baking parchment.
In a food processor blend the macadamia nuts with the cacao powder until it resembles flour; be careful not to overmix or you will end up with macadamia nut butter!
Remove from the food processor and combine in a bowl with the maple syrup, cacao nibs, vanilla and salt. Mix well and press the mixture into the spring-form tin to form the crust. Set aside.
To prepare the filling, mix the matcha with the hot water in a small bowl. Set aside.
In a high-speed blender, mix the cashews, nut milk, lemon and lime juice, agave syrup, vanilla extract and salt until smooth.
Then add the matcha mix and blend again. With the blender running, add the coconut oil and blend until completely smooth.
In a small bowl mix the extra ¼ teaspoon of matcha with ¼ teaspoon of hot water. Set aside to decorate.
To assemble, pour the cheesecake filling on top of the crust. Carefully shake the mould to level the mixture and get rid of any air bubbles. Pour the extra matcha mixture on top of the filling and use the tip of a small knife to swirl it and create whatever design you like.
Cover with cling film and place in the freezer for 3 hours.
Remove the cheesecake from the freezer and carefully release it from the spring-form tin. Keep it in the fridge until serving.
Extracted from Keep It Real by Calgary Avansino, published by Yellow Kite, £25
Photography by Kristin Perers
